Tag Archives: Soil Health

Preparing Beds for the Winter

Now that winter is underway here in Texas, I thought I would take some time to write about garden bed preparation for the winter sleep and rejuvenation.

If your area is anything like ours, by the time the temperatures started south, you already had an abundance of the perfect material to work into  and cover your beds… leaves. In Texas, we have a type of tree called a “live oak,” which is an evergreen and an “ever-shedder.” This tree drops leaves periodically throughout the year. If you are diligent with your leave cleanup, you should be stockpiling leaves for winter prep. Here is a nice write-up on live oaks: Live Oak Trees

I am fortunate enough to have several types of trees on property and mulching leaf blower/vacuum, so I am able to create a good amount of organic material for my garden beds. In addition, I have a good friend with three horses who lets me clean up her stalls and bring ample amounts of manure home. Remember, organic matter is essential for building good soil over time. It replenishes nutrients in the soil, helps with microbial beings, and provides good loose composition, which is essential for plant growth.

It is not recommended that you mix leaves into your soil. Decomposition of leaves uses nitrogen, which is one of the nutrients you are trying to replenish while the soil is sleeping over the winter. I am mixing a small amount of leaves into my soil (because I have a heavy clay base), but I am also added a significant amount of manure and compost as well.

When thinking about building soil, think about what happens in nature. On the forest floor, leaves, branches and other organic items sit on top of the soil. As time passes, the bottom layer decomposes, essentially creating new topsoil material. This is the same method you really want to use in winterizing your soil, except you are going to have to replenish the nutrients much faster, since in the south, there is a much shorter winter season.

Once you’ve mixed in the nutrients into your soil, you’ll want to provide a good cover which will shield good bugs, worms and microbes from the winter cold, while at the same time decompose and provide more organic matter. Leaves are the perfect solution and I recommend an initial layer of four inches of leaves at the onset of cold weather. Wet that layer down significantly and allow it to set and shrink over the next three weeks. Add another layer of leaves and rinse and repeat this process until late February.

By the time planting season starts up in late March (or so), your soil will be in great shape!

Building a Raised Bed

Raised bed gardens are gaining momentum with urban gardeners everywhere because of the advantages they bring. I began building raised beds for my garden two years ago and started with 6″ depths. After the first two growing seasons, I realized I would have to increase that depth, simply because of the soil composition here in south central Texas.

For those of you curious about the advantages of raised bed gardens, here are a few:

  • Good drainage – excess moisture is pulled away very efficiently.
  • Raised bed gardens have less issue with soil compaction.  Since raised beds are generally built so plants can be accessed without stepping on the soil, compaction is virtually eliminated.  Roots need air and soil compaction hinders this.
  • Seeds can be planted closer together.  Because of the reduced soil compaction, more plants can occupy the same area.
  • Raised bed garden soil warms up quicker during the spring, enabling earlier planting.
  • Raised bed gardens are pleasing to they eye because they can be built and arranged to create pathways and sitting areas.
  • Soil health can be more closely monitored and controlled. You can customize your soil composition based on raised bed, thereby creating optimized environments for each plant family or preference.

This year, I have made a goal for myself to eliminate as much of my back yard as possible. Why? Well, because I live in central Texas, and I would rather create a drought-resistant environment and water my food and the area wildlife, instead of a lawn.

So, we have put in a water garden, not only to create a pleasant place for us, but to create a nice habitat for birds and other creatures. They need water too! We are also filling up what is left of my back yard with plants and flowers which provide leaves for butterfly worms to eat and pupate upon and to provide seeds naturally for the birds which frequent our place. (We have bird feeders as well, but want to supplement them.)

Recently, I decided to change up how my raised beds would be constructed, starting with two new beds which would collectively eliminate approximately 180 square feet of lawn and provide 64 square feet of new garden space at a depth of 10″. I always try to leave space for wheelbarrows and such as I do a lot of hauling around my beds, continually trying to improve the soil quality.

This time, I used four 2″x6″x12′ rough cedar planks and an 8′ cedar 2″x4″. Each 12′ plank was cut into 8′ and 4′ sections, while the 2″x4″ was cut into six 16″ sections. When finished, there were 4″ posts jutting from the bottom of the raised bed frame, used for holding the bed in place.

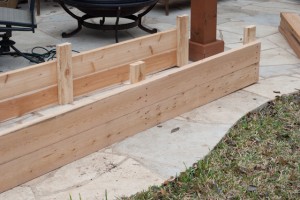
I used 3 1/2″ decking screws to attach two 8′ sections to three 16″ posts – even on one side and keeping the second plank section flush with the first. (See below)

Raised Bed Side Panels

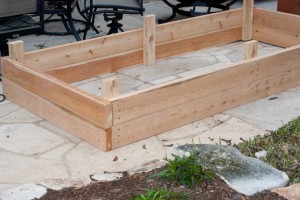
Once both 8′ sides were completed, I attached the 4′ sections to the ends, creating a nice rectangular box. It’s far easier to assembling these pieces with the frame upside down, allowing the tops to be flush. Here is the newly constructed bed.

Raised Bed Construction Complete

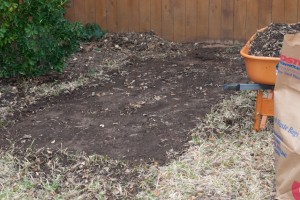
I had moistened the area of the yard I was going to clear and scraped all the sod away from the sections I was going to use as beds. Also, I always keep any sod I scrape up and then use my home-made compost sifter to separate good soil from the grass runners and roots.

Raised Bed Garden Base

After digging six shallow post holes for each bed, we set the beds in place and then began to level the areas. This part of the process takes the longest…probably because I’m a bit particular about my beds being level. I’m trying something different with my bed soil this time – it’s a tip I heard on the Natural Gardener radio show on Saturday mornings. The tip was to place a good bit of fertilizer about four inches below where you transplant vegetable plants. The idea being that when the roots take hold and then begin growing downward, they will hit the fertilizer and the plant will have a nice growth spurt. So, I filled the bottom three inches of the beds with horse manure and the rest with a combination of organic garden soil and compost. We’ll see what happens and I’ll post results.

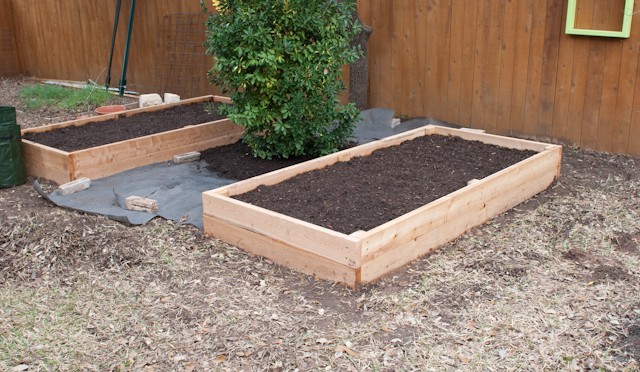
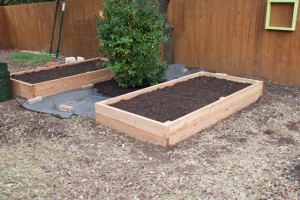
Here are our finished beds. (Along with a pile of grass sod I still have to sift.)

Completed Raised Bed Gardens